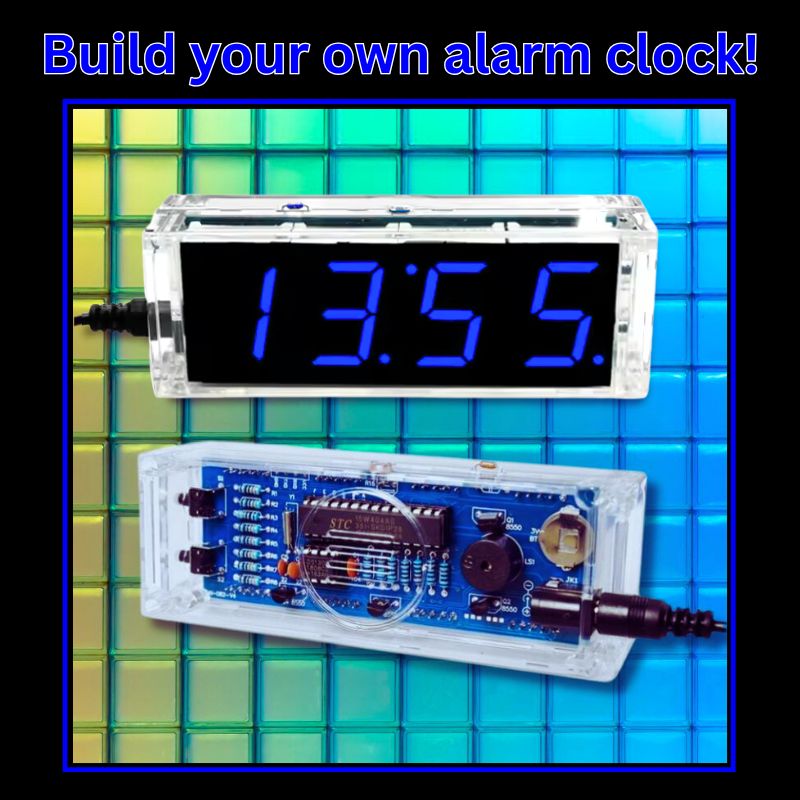
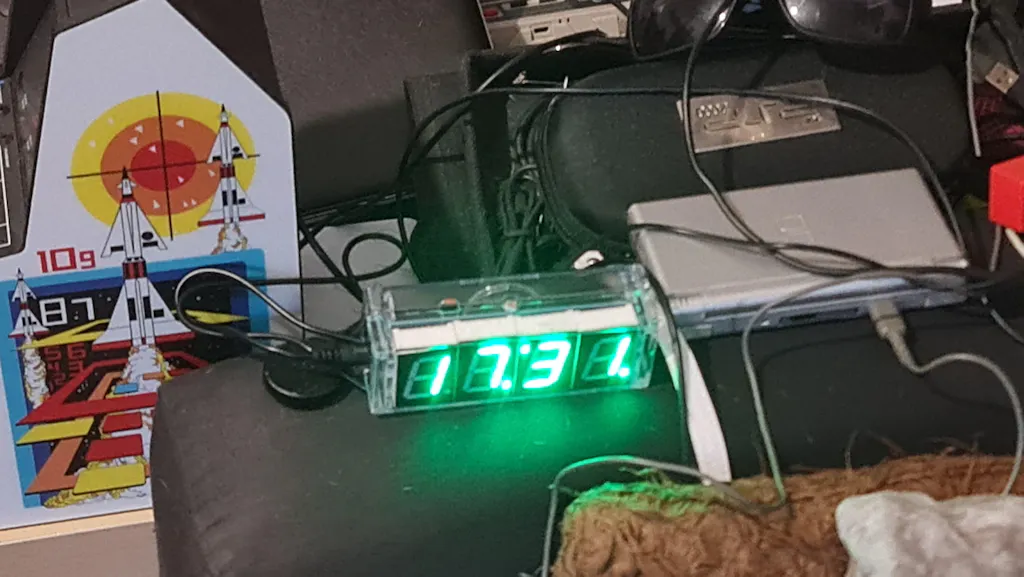
4-Digit Digital Clock kit
FREE SHIPPING (limited time only)
Couldn't load pickup availability
This kit is an ideal electronics STEM project for budding electronics enthusiasts seeking an immersive and user-friendly experience. The finished device is multi-functional, displaying time, temperature, and date, providing you with essential information at a glance. It also includes alarm and timer functions, adding practicality to your DIY creation.
The centerpiece of this kit is the striking 4-digit LED display. The display is light-sensitive, and automatically adjusts brightness to be sharper during the day and softer at night. The kit includes a USB power cord which ensures your device is always powered and ready.
Encased in a transparent housing, this device doesn't just provide useful information – it invites you to monitor its intricate inner workings in real-time. Whether you're a seasoned electronics hobbyist or a novice explorer, this DIY Digital Clock Kit promises an engaging and educational journey, marrying form and function seamlessly on your desk or nightstand.
Soldering iron & wire required. Buy both as a bundle and get 10% off! Click HERE.
Video: how to get started with Electronics
Further product information
Key Features
- Calculates and displays the date based on the user-set starting date.
- Adjusts display brightness based on ambient light using an LDR.
- Measures and displays temperature using a thermistor.
- Alarm function, set for any time and the alarm will sound via the 5V buzzer.
- Hourly chime feature; set the device to chime on the hour at user-defined time of the day (e.g.: can be set to not chime at night, or to not chime at all).
- RTC module which ensures timekeeping during power loss via a 3V battery.
Kit Components
All components required to build the device including:
- Printed Circuit Board
- STC15W408AS MCU
- 7 segment LED display block (4)
- DS1302 Trickle-Charge Timekeeping Chip
- 32.768kHz Oscillating Crystal
- Light dependent resistor
- 22 pF ceramic capacitor (3)
- 104 ceramic capacitor
- Glass encapsulated NTC thermistor
- S8550 transistors (4)
- 10 KΩ metal film resistor (8)
- 330 Ω metal film resistor (9)
- Side mount tactile switch (2)
- Buzzer
- DIP-8 IC socket
- DIP-28 IC socket
- USB to DC cable
- 3V Battery retainer clip
- DC power socket
- Acrylic case
- Phillips self-tapping screws (4)
Age: 12+
Difficulty: Intermediate
Time to assemble: 2-4 hours
Young children require adult supervision when soldering
Scientific principles illustrated
The Digital Clock Electronic STEM kit provides insights into some key scientific principles including:
Circuitry and Electricity
Learn about the flow of electricity and the function of components in electronics. Understanding the function of individual electronic components is crucial for electronic engineers.
The kit introduces LED digital display tubes and demonstrates how they provide meaningful visual output from a circuit.
It illustrates how transistors act as electronic switches or amplifiers, which they do by controlling the flow of current in a circuit based on the input signal.
It covers capacitors which store and release electrical energy, acting as temporary reservoirs that smooth voltage fluctuations, filter signals, and facilitate timing functions in electronic circuits.
It includes resistors which are for controlling current to protect sensitive components such as low voltage LEDs.
The kit employs sensors - a thermistor which records real-time temperature and a light dependent resistor which detects light level. This is then fed into the circuit and adjusts the power to the LED display in order to control brightness. These important features demonstrate how sensors can take external inputs to perform various functions within an electronic device.
Soldering Techniques
Gain practical experience in soldering, a fundamental skill in electronics. This process involves melting solder to make secure electrical connections. For engineers wishing to design their own electronic devices, traditional soldering skills are essential for prototyping.
Integrated Circuits (ICs)
The kit includes integrated circuits which give insight into the complex electronics that power today's devices. You will learn about the role of ICs to process and control aspects of the circuit. This knowledge is foundational for understanding advanced electronic systems.
Button Mechanism
The buttons in the kit highlights the concept of manual control and input. You will discover how a button can be used to switch between various functions of the device. This provides a basic understanding of manual control in electronics.
Printed Circuit Board (PCB)
Assembling the kit involves working with a printed circuit board. Learners gain insight into PCB design. They can explore the intricacies of the PCB to learn how connections are made. They also learn how parts are strategically arranged on PCBs to ensure devices are as small as possible while also having low interference between components.
Practical Problem Solving
Building the digital clock encourages budding electronics engineers to troubleshoot and problem-solve. They learn to find issues in the circuits and how to fix problems. This promotes a practical approach to solving real challenges in electronics.
Ships from: International Warehouse
View full details
My first project with Science Hut, assembly instructions clear, operating instructions a bit confusing but I figured it out. Next up: USB speaker.
Hi Ned, thank you very much for taking the time to leave this review, we really appreciate it. Glad that you figure out the set-up... it isn't very intuitive with only two buttons to control so many functions... if you have any recommendations on how the instructions could be clearer, we'd be delighted to hear them and possibly include them in the next revision of the instruction manual. I can see you've already received the bluetooth speaker - feel free to drop us an email at info@thesciencehut.com if you need any questions answered for that build - good luck with it!
Assembled in around 2 hours, works great. The clear case is fairly solid, and the LED display is responsive, being brighter in daylight than it is in the dark. Would like if it had a battery compartment in addition to the USB charging port. Might take one out of some broken remote or something and attach it up myself :)
Survived the post. I'm going to try it soon. Comes with instructions and assembly scheme. On the PCB itself also indicates where the components go. If everything goes well, I will put the result soon. Thank you!
Great looking kit, looks pretty straight forward to assemble.